How to Build a React PDF Viewer with PDF.js
By Logan Bittner | 2018 Oct 17
8 min
Tags
tutorial
react
view
pdf.js
React components are chunks of isolated code you can easily share across your entire UI, and even across multiple projects. This post describes how to create a React PDF.js viewer component you can use in your projects to open and display a PDF file in React. We will also cover an abstraction technique you can use to help future-proof your code.
We offer related guides for those interested in how to open PDF and Office files in React or how to create a Next JS PDF viewer.
Types of Open-Source React PDF Libraries
There are numerous quality open-source React PDF.js libraries available. One popular library, with more than 400,000 weekly downloads on NPM, is React PDF. Built on top of PDF.js, this is a good place to look for a simple, fast way to view existing PDFs. To learn more about this library, refer to our comparison guide blog post.
For this tutorial, we’ll use on Create React App. This library isn’t quite as popular as React PDF, but with 100,000 weekly downloads on NPM, we like it because it has everything you need to build a modern, single-page React app.
Some Create React App features include:
- Syntax support for React, JSX, ES6, TypeScript, and Flow.
- An interactive unit test runner.
- A live development server that warns about common mistakes.
- A build script to bundle JS, CSS, and images for production, with hashes and sourcemaps.
Requirements to Get Started
Before starting on this project, you need Node 16.0.0 or a later version on your local development machine.
Step 1 - Create Your React JS PDF Viewer Project
Use the following commands to generate your PDF.js React project:
npx create-react-app my-app
cd my-app
The command may ask you to install some dependencies. If it does, type "y" to continue.
This installs React and any other dependencies you need. Now you can start your local server by running:
npm startNavigate to http://localhost:3000/ and you should see the default create-react-app welcome screen.
Step 2 - Project Setup
Next we need to set up our project. First, let’s start by clearing the templates that create-react-app provides. Navigate to src/App.js and delete all the code inside the render function, except the outer div. The file should now contain:
import './App.css';

function App() {
  return (
    <div className="App">

    </div>
  );
}

export default App;
We can also delete any other unused code. Delete src/logo.svg and App.test.js, and replace all the css in App.css with the following snippet:
html, body, #root, .App {
  width: 100%;
  height: 100%;
}
Let's also disable React strict mode as it can cause some problems in local development. Update src/index.js to contain the following:
import React from 'react';
import ReactDOM from 'react-dom/client';
import './index.css';
import App from './App';
import reportWebVitals from './reportWebVitals';

const root = ReactDOM.createRoot(document.getElementById('root'));
root.render(
  <App />
);

// If you want to start measuring performance in your app, pass a function
// to log results (for example: reportWebVitals(console.log))
// or send to an analytics endpoint. Learn more: https://bit.ly/CRA-vitals
reportWebVitals();
Now we need to create our PDF viewing component that will let us show a PDF in React. Let’s create the file src/components/PDFViewer.js and start by writing a basic React component.
export default function PDFViewer() {
  return (
    <div id='viewer' style={{ width: '100%', height: '100%' }}>
      Hello world!
    </div>
  )
}
Now, back in App.js, let's import this component and render it. App.js should now look like this:
import './App.css';
import PDFViewer from './components/PDFViewer';

function App() {
  return (
    <div className="App">
      <PDFViewer />
    </div>
  );
}

export default App;
If you take a look at http://localhost:3000, you should see a little “Hello world!” on a white background.
Step 3 - Defining Our Backend to Render Pages in React
Now it’s time to start adding some functionality!
Instead of hardcoding PDF functionality right inside our React component, we will use a more abstracted approach and pass a class that implements a set of functions to the component. We call these classes 'backends', and they help the component render the PDF. Using this approach makes our React component even more reusable and future proof.
Let’s create our first backend that renders a PDF using PDF.js. Create the file src/backends/pdfjs.js and export a class that contains an init function.
export default class PDFJs {
  init = () => {

  }
}
Most PDF libraries require you to pass a DOM node to render the PDF inside. We also need to know which PDF to render in the first place. Let’s make the init function accept both of these things as parameters.
export default class PDFJs {
  init = (source, element) => {

  }
}
Before we start implementing PDF rendering, let’s get this backend hooked up to our component. In App.js, import the pdfjs.js backend and pass it as a prop to our PDFViewer component. We’re also going to need a PDF source, so let's pass that as well. App.js should now look something like this:
import './App.css';
import PDFViewer from './components/PDFViewer';
import PDFJSBackend from './backends/pdfjs';


function App() {
  return (
    <div className="App">
      <PDFViewer
        backend={PDFJSBackend}
        src='/myPDF.pdf'
      />
    </div>
  );
}

export default App;
Now in our PDFViewer component, let's implement the backend's init function. First we start by creating an instance of the backend and storing it to the component.
import { useRef } from "react"

export default function PDFViewer(props) {

  const viewerRef = useRef(null)
  const backend = useRef(new props.backend())

  return (
    <div ref={viewerRef} id='viewer' style={{ width: '100%', height: '100%' }}>
      Hello world!
    </div>
  )
}
Since we need reference to a DOM node inside our init function, we call it inside useEffect. We pass it a reference to the #viewer div (using React refs), as well as the PDF source. We can also remove the "Hello world" from the render function while we're at it. PDFViewer.js should now look like this:
import { useEffect, useRef } from "react"

export default function PDFViewer(props) {

  const viewerRef = useRef(null)
  const backend = useRef(new props.backend())

  useEffect(() => {
    backend.current.init(props.src, viewerRef.current)
  }, [])

  return (
    <div ref={viewerRef} id='viewer' style={{ width: '100%', height: '100%' }}>

    </div>
  )
}
The final step is making our init function actually do something. Let's test it out by making it render some text.
export default class PDFJs {
  init = (source, element) => {
    const textNode = document.createElement('p');
    textNode.innerHTML = `Our PDF source will be: ${source}`;

    element.appendChild(textNode);
  }
}
http://localhost:3000 should now display "Our PDF source will be: /myPDF.pdf".
Step 4 - Implementing PDF.js
We start by using the open source PDF.js library to render a PDF. Download the library from https://mozilla.github.io/pdf.js/getting_started/#download and extract the contents inside the public folder of our project.
We also need a PDF file to view. You can download one, or use your own. Place it in the public folder as well. Make sure to name it "myPDF.pdf", or update the src prop in App.js to the new file name.
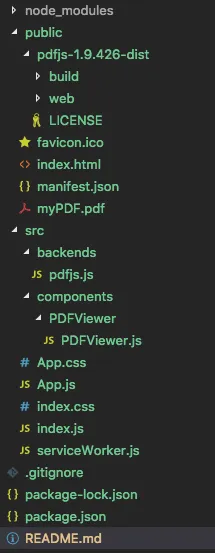
Your overall project structure now looks something like this (your version number of PDF.js may be different — this is okay):
We implement PDF.js UI by using an iframe to point to its viewer file. In our init function, we create an iframe and set its source to the PDF.js UI, and we use query params to tell the UI which PDF to render. Once the iframe is created, we append it to the DOM element passed into the init function.
src/backends/pdfjs.js should now look like this. Make sure to update the version number if yours is different.
export default class PDFJs {
  init = (source, element) => {
    const iframe = document.createElement('iframe');

    iframe.src = `/pdfjs-1.9.426-dist/web/viewer.html?file=${source}`;
    iframe.width = '100%';
    iframe.height = '100%';

    element.appendChild(iframe);
  }
}
That's it! If you check out http://localhost:3000, you should see your PDF displayed inside the PDF viewer in React.
Viewing a PDF using PDF.js is fairly easy, but once you want to start annotating or using more advanced features such as real-time collaboration, redaction, or page manipulation, you must implement these things yourself. See our Guide to Evaluating PDF.js to learn more.
That's where Apryse comes in. Our WebViewer library provides all these features out of the box, with zero configuration. WebViewer also has far better render accuracy in many cases.
Want to learn more about WebViewer? Check out our comprehensive guide here.
Implementing a React PDF Viewer with WebViewer
WebViewer is Apryse's JavaScript PDF Viewer, which allows you to open PDFs, view Office docs, and many other file formats right in the browser — view a demo.
Start by installing WebViewer into the project with npm.
npm i @pdftron/webviewerWe'll need to copy some static resources from WebViewer into our "public" directory as well. Run the following command to do so:
cp -R ./node_modules/@pdftron/webviewer/public ./public/webviewerWe are now ready to create our WebViewer backend. Create the file src/backends/webviewer.js, and export a class with an init function that accepts a PDF source and a DOM element. (You can probably see where this is going!)
Copy this WebViewer constructor code into the init function:
import WebViewer from "@pdftron/webviewer";

export default class PDFTron {
  init = (source, element) => {
    WebViewer({
      path: '/webviewer', // point to where the files you copied are served from
      initialDoc: source
    }, element)
  }
}
Now is when all our hard work pays off! To switch our app to use WebViewer instead of PDF.js, just pass a different backend to our component. In App.js, replace the PDF.js backend with our new WebViewer backend.
import './App.css';
import PDFViewer from './components/PDFViewer';
// import PDFJSBackend from './backends/pdfjs';
import WebViewerBackend from './backends/webviewer'

function App() {
  return (
    <div className="App">
      <PDFViewer
        backend={WebViewerBackend}
        src='/myPDF.pdf'
      />
    </div>
  );
}

export default App;
And that's it! Our PDFViewer component doesn't require any changes because it already knows to call the init function when the component is mounted.
Extending the Backends (Optional)
Let's say we want to implement a programmatic rotate feature into our component.
Start by adding a rotate function into our WebViewer backend.
import WebViewer from "@pdftron/webviewer";

export default class PDFTron {
  init = (source, element) => {
    WebViewer({
      path: '/webviewer', // point to where the files you copied are served from
      initialDoc: source
    }, element)
  }

  rotate = (direction) => {

  }
}
We also need reference to our WebViewer instance, so let's save this as part of the instance in our init function.
import WebViewer from "@pdftron/webviewer";

export default class PDFTron {
  init = (source, element) => {
    WebViewer({
      path: '/webviewer', // point to where the files you copied are served from
      initialDoc: source
    }, element).then((instance) => {
      this.instance = instance;
    })
  }

  rotate = (direction) => {

  }
}
We can now use the WebViewer rotateClockwise and rotateCounterClockwise functions to rotate the current document. For more information, see the documentation.
import WebViewer from "@pdftron/webviewer";

export default class PDFTron {
  init = (source, element) => {
    WebViewer({
      path: '/webviewer', // point to where the files you copied are served from
      initialDoc: source
    }, element).then((instance) => {
      this.instance = instance;
    })
  }

  rotate = (direction) => {
    if(direction === 'clockwise') {
      this.instance.Core.documentViewer.rotateClockwise();
    } else {
      this.instance.Core.documentViewer.rotateCounterClockwise();
    }
  }
}
Now, we just need to implement this into our PDFViewer component.
import { useEffect, useRef } from "react"

export default function PDFViewer(props) {

  const viewerRef = useRef(null)
  const backend = useRef(new props.backend())

  useEffect(() => {
    backend.current.init(props.src, viewerRef.current)
  }, [])

  const rotate = (direction) => {
    backend.current.rotate(direction)
  }

  return (
    <div ref={viewerRef} id='viewer' style={{ width: '100%', height: '100%' }}>

    </div>
  )
}
That's it! You could now implement a rotate function to your PDF.Js backend if you wanted.
To use this rotate function, we can get a reference to our PDFViewer component and call the rotate function directly.
import { useEffect, useRef } from "react"

export default function PDFViewer(props) {

  const viewerRef = useRef(null)
  const backend = useRef(new props.backend())

  useEffect(() => {
    backend.current.init(props.src, viewerRef.current)
  }, [])

  const rotate = (direction) => {
    backend.current.rotate(direction)
  }

  return (
    <>
      <button onClick={() => rotate('clockwise')}>Rotate clockwise</button>
      <div ref={viewerRef} id='viewer' style={{ width: '100%', height: '100%' }}>

      </div>
    </>
  )
}
Conclusion
As you can see, viewing a PDF inside a React app isn't tough using open source software. If you need more features, Apryse WebViewer is just as simple to implement but gives you advanced functionality built right in:
- Annotations
- Real-time document collaboration
- Form filling
- PDF editing
- Digital signatures
- Text search
- And much more
We also saw how abstracting the functionality allows us to future-proof our code and allow us to easily switch from one viewer to another without touching our components.
For more information, see the full source code for React PDF viewer example. View a full demo of WebViewer and feel free to compare it to the PDF.js viewer.
Also, check out our React PDF generator post. or read up on the Apryse PDF SDK.
If you have any questions about implementing WebViewer in your project, please contact us and we will be happy to help!
Tags
tutorial
react
view
pdf.js

Logan Bittner
Share this post


