Creating a PDF Using Ruby on Rails
By Roger Dunham | 2024 Apr 18

12 min
Tags
ruby on rails
generation
Back in 2018, we wrote a blog about how to use wkhtmltopdf to convert the output of a Ruby on Rails project into a PDF.
A lot has happened since then:
- wkhtmltopdf stopped being supported in August 2020, and their website says: Do not use wkhtmltopdf with any untrusted HTML since it could lead to the complete takeover of the server.
- Ruby has moved on from 2.5 to 3.3, and 3.0 is now end-of-life.
- Rails has moved on from 5.2.1 to 7.1.3.
- Even PDFTron has changed – it was rebranded as Apryse last year.
But some things don’t change – for example, the need to create PDFs on a Rails server.
In this article, we will look at how to do this in two parts:
Part 1: Creating a website that displays data from an invoice database. Each invoice contains information about the customer and will have one or more line items.
Part 2: Converting the output of that website into a PDF.
If you are familiar with using Ruby on Rails to create websites, you may want to jump straight to the second part.
Learn how to generate PDFs using JavaScript.
Configuration
This article was written using sample code running in the following environment:
- Ubuntu 22.04.03 (running under WSL on Windows 11)
- Ruby 3.3.0
- Rails 7.1.3 (installed using asdf)
Getting the Source Code for the Project
The source code for this project can be found at https://github.com/PDFTron/rails-generate-pdf.
Here, we will go through the various steps of creating the working code, so you may wish to use that GitHub repo as a fallback. It will, however, be useful for getting the styling for the Views, and getting example data for seeding the database. It also holds the Word document template we will use in the second part of this article.
Creating a Ruby on Rails-Based Website
Step 1: Create a New Ruby on Rails App
Copy the following code into the Ubuntu terminal:
rails new rails-generate-pdfThis will scaffold the project and install the required dependencies.
Step 2: Create the Models
Two models are needed, one for Invoice and one for InvoiceItem.
Generate the model for the Invoice class:
rails generate model Invoice from_full_name from_address from_email from_phone to_full_name to_address to_email to_phone status discount:decimal vat:decimalThen copy the following code into the model file rails-generate-pdf/app/models/invoice.rb.
# file: rails-generate-pdf/app/models/invoice.rb

class Invoice < ApplicationRecord

    has_many :invoice_items, dependent: :destroy


    STATUS_CLASS = {

        :draft => "badge badge-secondary",

        :sent => "badge badge-primary",

        :paid => "badge badge-success"

    }


    def subtotal

        self.invoice_items.map { |item| item.qty * item.price }.sum

    end


    def discount_calculated

        subtotal * (self.discount / 100.0)

    end


    def vat_calculated

        (subtotal - discount_calculated) * (self.vat / 100.0)

    end


    def total

        subtotal - discount_calculated + vat_calculated

    end


    def status_class

        STATUS_CLASS[self.status.to_sym]

    end


end
Repeat the process for the InvoiceItem model.
rails generate model InvoiceItem name description price:decimal qty:integer invoice:referencesThe model file rails-generate-pdf/app/models/invoice_item.rb will be automatically generated and should not need changing, but you may want to verify that it is correct.
# file: rails-generate-pdf/app/models/invoice_item.rb

class InvoiceItem < ApplicationRecord

    belongs_to :invoice

end
Step 3: Migrate the Database
Now migrate the database to include the schema for these models.
rails db:migrateWhen this successfully completes the console will show something like this:
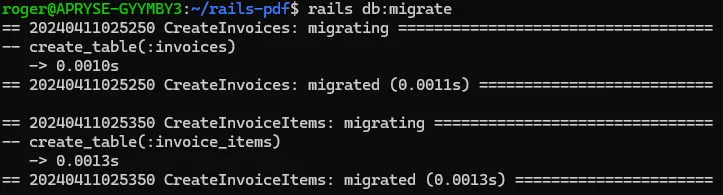
Figure 1 – Typical output after successfully migrating the database
Step 4: Create a Controller and Setup Routes
Enter the following code into the console:
rails generate controller Invoices index showThis will automatically create a basic controller. Copy the following code into the file rails-generate-pdf/app/controllers/invoices_controller.rb:
class InvoicesController < ApplicationController

 def index

   @invoices = scope

 end


 def show

   @invoice = scope.find(params[:id])


   respond_to do |format|

     format.html

   end

 end


 private

   def scope

     ::Invoice.all.includes(:invoice_items)

   end

end
This will allow us to see the collection of invoices, or the details for an individual one.
Step 5: Set up Routes
Update the file rails-generate-pdf/config/routes.rb.
Rails.application.routes.draw do

  root 'invoices#index'


 resources :invoices, only: [:index, :show]

  get 'invoices/index'

  get 'invoices/show'

end
Step 6: Set Up the View Part of the Application
A view is needed for the invoices index. A stub one will have been created called rails-generate-pdf/app/views/invoices/index.html.erb, so find that and enter the following code.
<table class="table table-striped">

 <thead>

  <tr>

   <th scope="col">Date</th>

   <th scope="col">From</th>

   <th scope="col">To</th>

   <th scope="col">Status</th>

   <th scope="col">Discount (%)</th>

   <th scope="col">VAT (%)</th>

   <th scope="col">TOTAL</th>

   <th scope="col"></th>

  </tr>

 </thead>

 <tbody>

  <% @invoices.each do |invoice| %>

   <tr>

    <th scope="row"><%= invoice.created_at.strftime('%d/%m/%Y') %></th>

    <td><%= invoice.from_full_name %></td>

    <td><%= invoice.to_full_name %></td>

    <td><span class="<%= invoice.status_class %>"><%= invoice.status %></span></td>

    <td><%= invoice.discount %></td>

    <td><%= invoice.vat %></td>

    <td><%= number_to_currency(invoice.total) %></td>

    <td><%= link_to 'View', invoice_path(invoice) %></td>

   </tr>

  <% end %>

 </tbody>

</table>
You will also need to set up the file rails-generate-pdf/app/views/invoices/show.html.erb. This is the file that shows the details for an individual invoice. It is quite large, so you may wish to get it directly from GitHub.
<div class="invoice-box">

    <table cellpadding="0" cellspacing="0">

     <tr class="top">

      <td colspan="4">

       <table>

        <tr>

         <td class="title">

         <%= image_tag ('company_logo.png') %>

         </td>


         <td>

          Invoice #: <b><%= @invoice.id %></b>

          <br>

          Created: <b><%= @invoice.created_at.strftime('%d/%m/%Y') %></b>

          <br>

          Due: <b><%= (@invoice.created_at + 1.month).strftime('%d/%m/%Y') %></b>

          <br>

          Status: <span class="<%= @invoice.status_class %>"><%= @invoice.status %></span>

         </td>

        </tr>

       </table>

      </td>

     </tr>


     <tr class="information">

      <td colspan="4">

       <table>

        <tr>

         <td>

          <b><%= @invoice.from_full_name %></b><br>

          <%= @invoice.from_address %><br>

          <i class="far fa-envelope"></i> <%= @invoice.from_email %><br>

          <i class="fas fa-phone"></i> <%= @invoice.from_phone %>

         </td>


         <td>

          <b><%= @invoice.to_full_name %></b><br>

          <%= @invoice.to_address %><br>

          <i class="far fa-envelope"></i> <%= @invoice.to_email %><br>

          <i class="fas fa-phone"></i> <%= @invoice.to_phone %>

         </td>

        </tr>

       </table>

      </td>

     </tr>


     <tr class="heading">

      <td>Payment Method</td>

      <td colspan="2"></td>

      <td class="right">Cache</td>

     </tr>


     <tr class="details">

      <td>Delivery Method</td>

      <td colspan="2"></td>

      <td class="right">1000</td>

     </tr>


     <tr class="heading">

      <td>Item</td>

      <td class="right">Price</td>

      <td class="right">Qty</td>

      <td>Total</td>

     </tr>


     <% @invoice.invoice_items.each do |invoice_item| %>

      <tr class="item">

        <td>

          <%= invoice_item.name %><br>

          <small><%= invoice_item.description %></small>

        </td>


        <td class="right">

          <%= number_to_currency(invoice_item.price) %>

        </td>


        <td class="right">

          x <%= invoice_item.qty %>

        </td>


        <td>

          <%= number_to_currency(invoice_item.price * invoice_item.qty) %>

        </td>

      </tr>

     <% end %>


     <tr>

      <td colspan="4"></td>

     </tr>


     <tr>

      <td colspan="2"></td>

      <td><b>Subtotal</b></td>

      <td><%= number_to_currency(@invoice.subtotal) %></td>

     </tr>


     <tr>

      <td colspan="2"></td>

      <td><b>Discount (<%= @invoice.discount %>%)</b></td>

      <td>- <%= number_to_currency(@invoice.discount_calculated) %></td>

     </tr>


     <tr>

      <td colspan="2"></td>

      <td><b>VAT (<%= @invoice.vat %>%)</b></td>

      <td>+ <%= number_to_currency(@invoice.vat_calculated) %></td>

     </tr>


     <tr class="heading">

      <td colspan="2"></td>

      <td><b>TOTAL:</b></td>

      <td>

       <b><%= number_to_currency(@invoice.total) %></b>

      </td>

     </tr>

    </table>

  </div>
Create a file rails-generate-pdf/app/views/layouts/shared_header.html.erb and copy in the following code.
<nav class="navbar navbar-expand-lg navbar-light bg-light">

 <div class="container">

    <h1>Rails Generate PDFs</h1>

   <ul class="navbar-nav mr-auto mt-2 mt-lg-0">


   </ul>


   <% if action_name.to_sym == :show %>

    <%= link_to 'Back', root_path, class: "btn btn-outline-secondary mx-2" %>

    <%= link_to 'DOWNLOAD PDF', invoice_path(::Invoice.find(params[:id]), format: :pdf), class: "btn btn-outline-success my-2 my-sm-0" %>

   <% end %>


 </div>

</nav>
We will be calling that header from rails-generate-pdf/app/views/layouts/application.html.erb, so update that file as well.
<!DOCTYPE html>

<html>

 <head>

 <title>PDFs - Ruby on Rails</title>

  <meta name="viewport" content="width=device-width,initial-scale=1">

  <%= csrf_meta_tags %>

  <%= csp_meta_tag %>


  <%= stylesheet_link_tag "application", "data-turbo-track": "reload" %>

  <%= javascript_importmap_tags %>

 </head>


 <body>

 <%= render "layouts/shared/header" %>

 <div class="container mt-3">

  <%= yield %>

 </div>

</body>

</html>
Step 7: Copy in Images and Styling
While styling is not strictly needed for the app to work, it makes a huge difference to the results. The GitHub sample has CSS and a logo for the Invoice page, so these need to be copied into the files rails-generate-pdf/stylesheets and rails-generate-pdf/images.
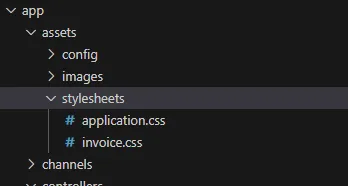
Figure 2 – The location of the stylesheets within the app
Phew! That was a lot of code to enter, but it will be worth it. Technically, that's all that is needed to get the app working. However, without data it would be rather dull. In your app, you will of course get the data from a real source. While we could write code to do that, it is not relevant to what we are trying to illustrate here, so we will take a shortcut.
Step 8: Seed the Database
We can use the rails-generate-pdf/config/seeds.db from the GitHub repository to set up initial values in the database by calling rails db:seed.
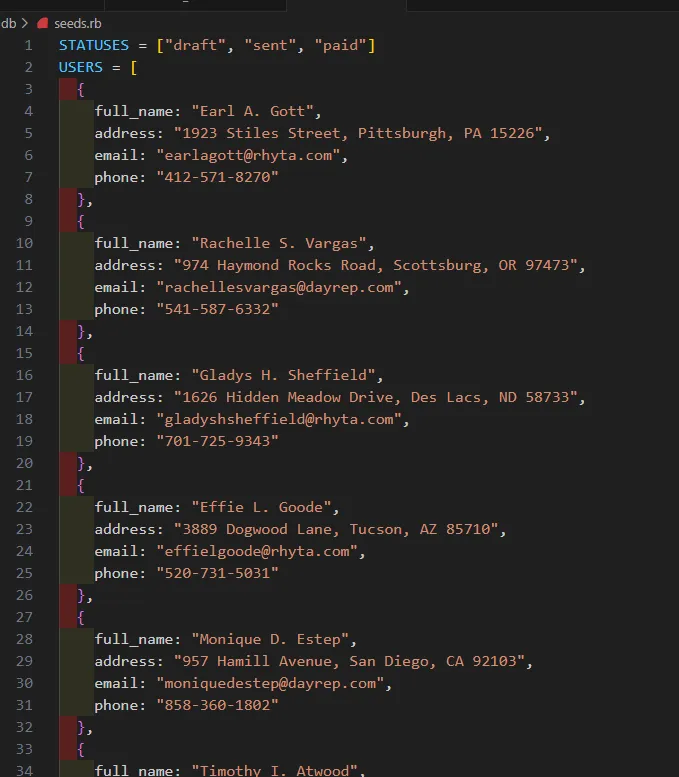
Figure 3 – Part of the dummy data file from the GitHub repo that can be used to seed the database
Step 9: Start the Server
Start the server by entering rails server, then navigate to the URL that is displayed (which in my case was 127.0.0.1:3000).
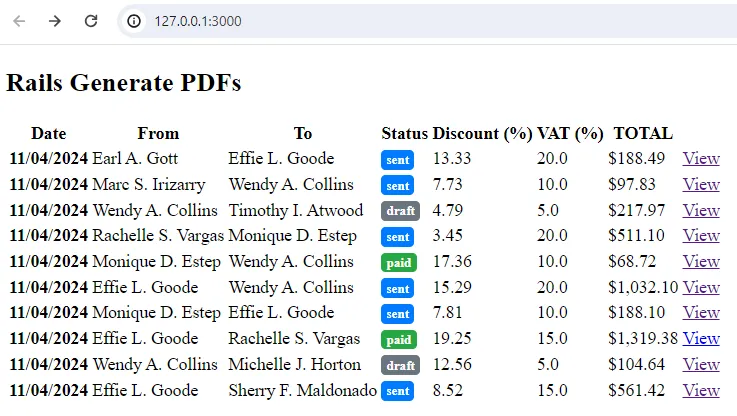
Figure 4 – An overview of the example invoices within the running app
Clicking on View for any line shows the details of that invoice.
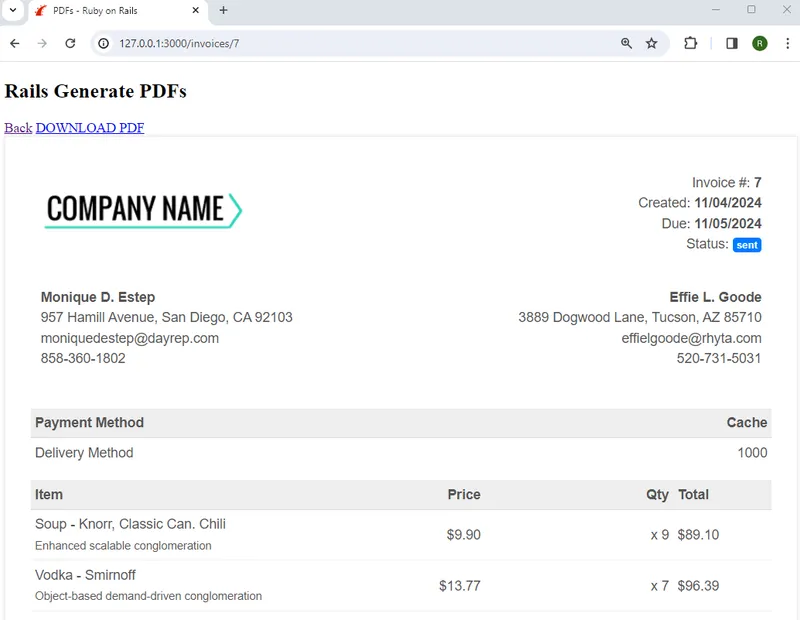
Figure 5 – The HTML based details for a specific invoice
Great! We have a Ruby on Rails app that shows either a summary of all invoices or the details for one. While that was fun, it wasn’t the aim of this article – which is to create a PDF using Rails – rather than just creating a webpage.
So let’s look at the next step – creating a PDF that uses the same data.
Creating a PDF that Contains the Invoice Data
There are several ways to generate a PDF once you have reached this point. You could convert the webpage into a PDF manually from the browser, or use tools such as wkhtmltopdf, prawn, or the Apryse HTML2PDF module.
While these offer a quick way to create a PDF, the quality of the result may not be as good as you hope for – partly because HTML can render differently depending on the size of the browser.
A great alternative is to use the Apryse SDK Document Generation mechanism. This takes a DOCX-based template and combines it with data in JSON format to make either a PDF or a DOCX document.
The Apryse SDK is available for many languages and platforms. The Ruby wrappers are available directly for macOS. For Linux and Windows it is necessary to build them, but this is easy to do.
The code in the app that calls the wrappers will need to know their location, so in ours we will store files in the lib folder of the app. If you store the wrappers somewhere else, you will need to modify the reference to the file.

Figure 6 – View of the folder where the Ruby wrappers for the Apryse SDK are located
The folder contains many files not needed, but for now we will leave them there. One of the folders that is not strictly needed is the Samples folder. This has a wide range of example code that illustrates the range of functionality of the Apryse SDK. One of the samples is OfficeTemplateTest, and the code in that sample is the basis for the technique that we will be using.
Step 1: Add PDF Processing to the Invoices Controller
As a very first step, update rails-generate-pdf/app/controllers/invoices_controller.rb to handle the pdf format. This code will be hit if the requested URL is, for example, http://127.0.0.1:3000/invoices/7.pdf.
If you haven’t added an alternative format before, it’s worth adding debug code to help you understand what is going on.
respond_to do |format|

     format.html

     format.pdf do

      logger.debug('Ready to create PDF')

     end

   end
Now if the endpoint ends in .pdf we should see some output in the console log, but in the browser, we will currently get an error. We will fix that later.
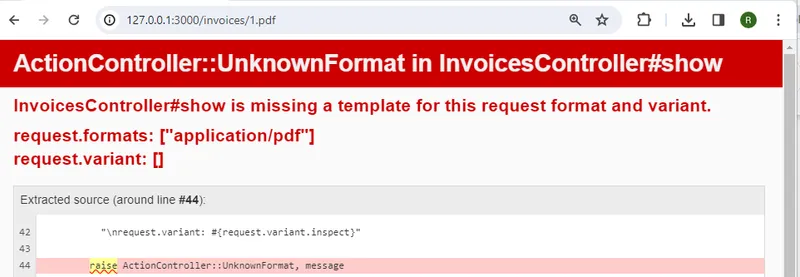
Figure 7 – Typical error if a format is added to the controller, but there is no template
Step 2: Add a Reference for PDFNetRuby
Now let’s add a reference to PDFNet within the controller using require.
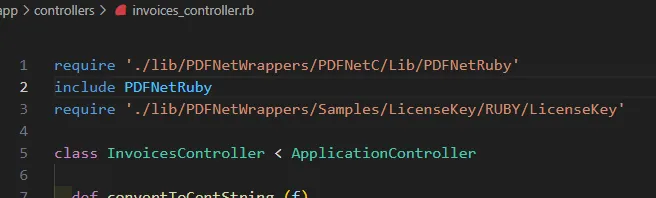
Figure 8 – Adding a reference to PDFNetRuby. The reference to the LicenseKey is one way to be able to specify the license key for the Apryse SDK. Alternatively, you could use an environment variable (or something similar) to keep the key secure.
Step 3: Implement the Processing for PDF Format
Further down the file we need to initialize PDFNet, and actually perform the document generation using Convert.CreateOfficeTemplate and templateDoc.FillTemplateJson.
    format.pdf do

      PDFNet.Initialize(PDFTronLicense.Key)

      $inputPath = "./app/assets/files/"

      inputFilename = "template.docx"


      # Create a TemplateDocument object from an input office file.

      inputFile = $inputPath + inputFilename

      templateDoc = Convert.CreateOfficeTemplate(inputFile, nil)


      # Fill the template with data from a JSON string, producing a PDF document.

      pdfdoc = templateDoc.FillTemplateJson(json)

      buffer = pdfdoc.Save(SDFDoc::E_linearized)


      send_data(buffer, filename: 'my-awesome-pdf.pdf', type: 'application/pdf', :disposition=>'inline')

      PDFNet.Terminate()

    end
Step 4: Set Up the Template
The file template.docx is included in the GitHub repo. It is just an ordinary Word document, but it uses “mustache braces” to specify where and what data should be inserted.
Word templates are great. Word is familiar to most people, and many people find it far easier to set up style and layout using Word rather than HTML and CSS.
As such, templating via Word offers a way to rapidly go from prototype to production.
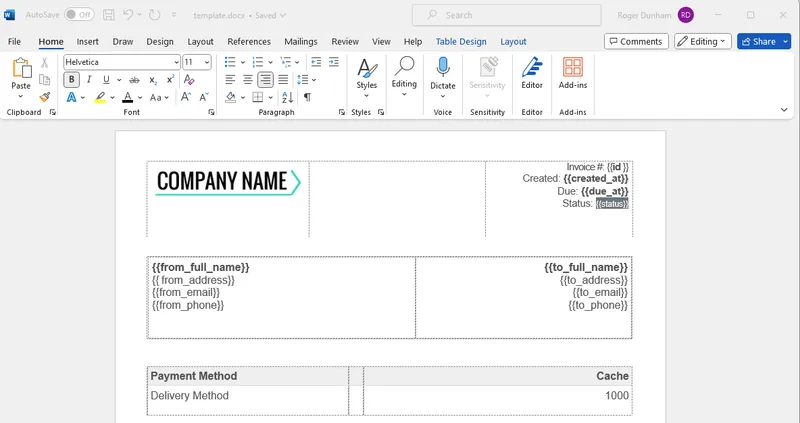
Figure 9 – Part of the template.docx file
Step 5: Get the Data into JSON Format
Note that Apryse Document Generation requires the data to be JSON, with all values being specified as strings.
As the data for our Ruby app is in a Sqlite3 database, which was not set up to be JSON friendly, it is necessary in this example to massage the data to fit the required format. However, that is not necessarily difficult to do.
The following code shows one way this can be done, though you may have a preferred alternative style.
invMod = Object.new

invMod.instance_variable_set(:@id, @invoice.id.to_s)

invMod.instance_variable_set(:@subtotal, convertToCentString(@invoice.subtotal))

invMod.instance_variable_set(:@discount_calculated, convertToCentString(@invoice.discount_calculated))

invMod.instance_variable_set(:@vat_calculated, convertToCentString(@invoice.vat_calculated))

invMod.instance_variable_set(:@total, convertToCentString(@invoice.total));

invMod.instance_variable_set(:@from_full_name, @invoice.from_full_name);

invMod.instance_variable_set(:@from_address, @invoice.from_address);

invMod.instance_variable_set(:@from_email, @invoice.from_email);

invMod.instance_variable_set(:@from_phone, @invoice.from_phone);

invMod.instance_variable_set(:@to_full_name, @invoice.to_full_name);

invMod.instance_variable_set(:@to_address, @invoice.to_address);

invMod.instance_variable_set(:@to_email, @invoice.to_email);

invMod.instance_variable_set(:@to_phone, @invoice.to_phone);

invMod.instance_variable_set(:@created_at, (@invoice.created_at).strftime('%d/%m/%Y'));

invMod.instance_variable_set(:@due_at, (@invoice.created_at + 1.month).strftime('%d/%m/%Y'));

invMod.instance_variable_set(:@discount, @invoice.discount);

invMod.instance_variable_set(:@vat, @invoice.vat);

invMod.instance_variable_set(:@status, @invoice.status);


# add the rows

rows = []

@invoice.invoice_items.each do |key, item|

 puts key.to_json

row= Object.new

 row.instance_variable_set(:@name, key.name);

 row.instance_variable_set(:@description, key.description);

 row.instance_variable_set(:@price, key.price);

 row.instance_variable_set(:@qty, key.qty.to_s);

 row.instance_variable_set(:@total, key.qty.to_d * key.price.to_d);

 rows << row

end


invMod.instance_variable_set(:@rows, rows)

json = invMod.to_json
Step 6: Run the Server
Restart the server using rails server.
Now if you enter a URL that ends in .pdf, the code will generate, return, and display the PDF.
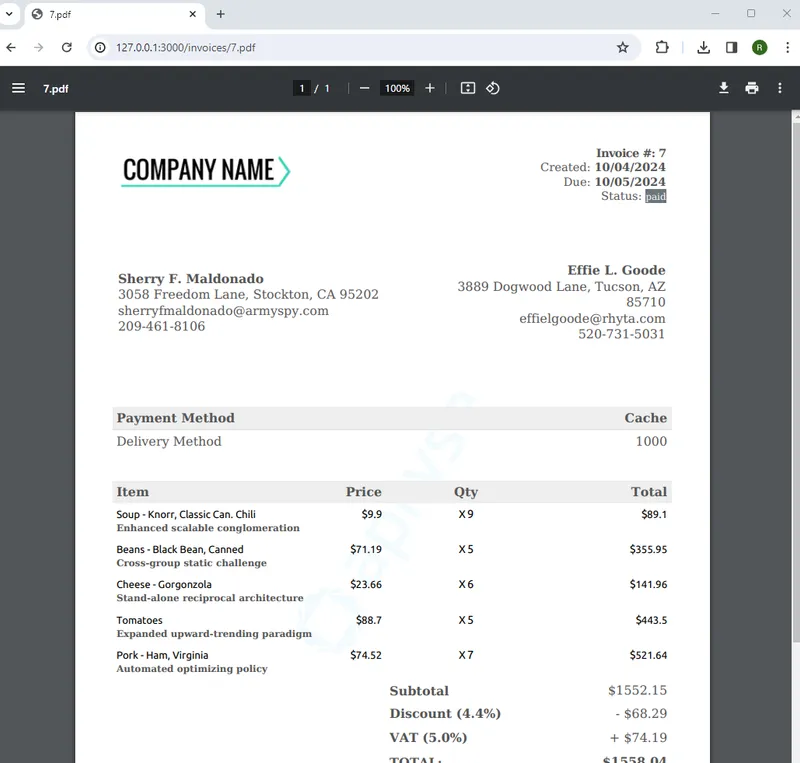
Figure 10 – Typical output when creating a PDF from our Ruby on Rails project
That’s pretty awesome!
What Next?
We’ve seen how we can generate a PDF from the same data that we used to create the Views in our app. A huge benefit of using the Apryse SDK is that we can do much more than just create PDFs. We could combine the incoming data with annotations and create an annotated document, apply redactions, add digital signatures, extract data, or dozens of other things.
But for now, let's make one more change to the code. If we alter the handler to use:
     pdfdoc = templateDoc.FillTemplateJsonToOffice(json, [Filename])

     send_file([Filename], filename: 'my-awesome-docx.docx', type: 'application/vnd.openxmlformats-officedocument.wordprocessingml.document', :disposition=>'inline')
We can use the same mechanism to return a Word document rather than a PDF.
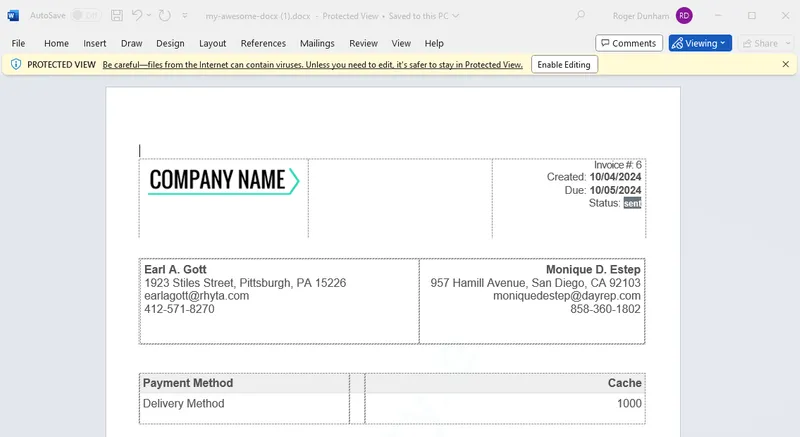
Figure 11 – A small change to the code allows a Word document to be created rather than a PDF.
Conclusion
We have seen how we can use the Apryse SDK to convert data that was used to create webpages in a Ruby on Rails app into a high quality PDF (or DOCX).
But so far, we have only scratched the surface of what the Apryse SDK can do.
You can get started with a free trial and then check out some of the Ruby code samples to help get you up and running quickly. In fact, if you have followed through the steps in this article, you will already have all the samples available, so dive in there and try them out.
When you are ready to go further, see the documentation for the SDK to get started quickly.
If you have any questions about the Apryse PDF SDK, please feel free to get in touch!
You can find the source code for this blog post at our GitHub rails-generate-pdf.
Tags
ruby on rails
generation

Roger Dunham
Related Products
Share this post