How to Convert DOCX Files to PDF with Node.js
By Andrey Safonov | 2020 Apr 24

6 min
Tags
conversion
docx
node.js
tutorial
Express or Express.js is described as a flexible framework for building web apps and APIs, as well as the de facto standard server framework for Node.js. Leveraging Express and Node.js enables devs to add powerful back-end functionalities to their web and mobile applications, and create feature-rich user experiences. Check out the following video for more info on building a PDF app with Express and Node.js.
Applications with DOCX to PDF conversion for documents like invoices are in high demand. Developers can develop an app with this feature to convert DOCX files like templates, no matter the size, with the help of Node.js.
In this blog, we show you how to create your very own file server using Node.js, Express, and the Apryse SDK Node.js PDF Library. Our sample project not only serves static files; it will also perform advanced document conversion like PDF to XLSX, PPTX, or DOCX to PDF (MS Office software or licenses not required), thumbnail generation, and more.
Check out this ready-to-go project sample on our Github. And if you do not have Node.js installed yet, download and install it from here.
Set Up Your Node.js Project
To get started, create a new folder, open it inside your terminal, and type the following:
$ npm init
The above command will walk you through the creation of a new project. The entry point, the file from which execution starts, is index.js by default.
Next, let’s install some project dependencies. The first one is Express.js, a lightweight web framework for Node.js.
$ npm install express --save
The second one is the Apryse SDK. This will facilitate file conversion, splitting of documents, thumbnail generation, optimization of PDFs, OCR, and many other document processing actions.
$ npm install @pdftron/pdfnet-node --save
The third one is nodemon, which enables hot reloading of the server while we develop and make changes to our code.
$ npm install nodemon --save
Once we are done with dependencies, we will get our package.json in order. Add the following under scripts.
"scripts": {
    "start": "nodemon index.js"
  },
The next step is to establish our entry point. Create a new file called index.js on the same level as package.json.
Afterwards, run npm start.
Create a Simple Express.js Server
Now we will create a simple Express server inside of index.js.
const express = require('express');
const port = 9000;

const app = express();

app.listen(port, () =>
  console.log(
    `nodejs-convert-file-server listening at http://localhost:${port}`,
  ),
);
Next, navigate to http://localhost:9000 and you should see your server running. No endpoints are created just yet, so you will be met with Cannot GET/. If you run into any other errors, check the terminal, since it might require a manual restart.
Serve Static Files From Node.js
We will create a new folder directory called files within your project. Let’s add an API to our index.js to return a list of files inside of it in JSON format.
app.get('/files', (req, res) => {
  const inputPath = path.resolve(__dirname, filesPath);
  fs.readdir(inputPath, function (err, files) {
    if (err) {
      return console.log('Unable to scan directory: ' + err);
    }
    res.setHeader('Content-type', mimeType['.json']);
    res.end(JSON.stringify(files));
  });
});
Mime data types are just a way of communicating what type of content the browser should expect. Therefore, I’ve prepared a handy module you can use:
// maps file extension to MIME types
// full list can be found here: https://www.freeformatter.com/mime-types-list.html
module.exports = mimeType = {
    '.ico': 'image/x-icon',
    '.html': 'text/html',
    '.js': 'text/javascript',
    '.json': 'application/json',
    '.css': 'text/css',
    '.png': 'image/png',
    '.jpg': 'image/jpeg',
    '.wav': 'audio/wav',
    '.mp3': 'audio/mpeg',
    '.svg': 'image/svg+xml',
    '.pdf': 'application/pdf',
    '.zip': 'application/zip',
    '.doc': 'application/msword',
    '.eot': 'application/vnd.ms-fontobject',
    '.ttf': 'application/x-font-ttf',
  };
To use this module inside of index.js, make sure you import it:
const mimeType = require('./mimeType');
Now, let’s create another endpoint that returns the requested file:
app.get('/files/:filename', (req, res) => {
  const inputPath = path.resolve(__dirname, filesPath, req.params.filename);
  fs.readFile(inputPath, function (err, data) {
    if (err) {
      res.statusCode = 500;
      res.end(`Error getting the file: ${err}.`);
    } else {
      const ext = path.parse(inputPath).ext;
      res.setHeader('Content-type', mimeType[ext] || 'text/plain');
      res.end(data);
    }
  });
});
Over at http://localhost:9000, if you append a path and a filename, you should get that file back in your response. For example, http://localhost:9000/files/test.pdf will return test.pdf if that file is present in the files folder.
Convert to PDF from DOCX, PPTX, or XLSX
Here is an example for how to convert an MS Office document into a PDF without needing MS Office software or licenses.
app.get('/convert/:filename', (req, res) => {
  const filename = req.params.filename;
  let ext = path.parse(filename).ext;

  const inputPath = path.resolve(__dirname, filesPath, filename);
  const outputPath = path.resolve(__dirname, filesPath, `${filename}.pdf`);

  if (ext === '.pdf') {
    res.statusCode = 500;
    res.end(`File is already PDF.`);
  }

  const main = async () => {
    const pdfdoc = await PDFNet.PDFDoc.create();
    await pdfdoc.initSecurityHandler();
    await PDFNet.Convert.toPdf(pdfdoc, inputPath);
    pdfdoc.save(
      `${pathname}${filename}.pdf`,
      PDFNet.SDFDoc.SaveOptions.e_linearized,
    );
    ext = '.pdf';
  };

  PDFNetEndpoint(main, outputPath, res);
});
To test it out, enter the following in the browser: http://localhost:9000/convert/test.docx.
Create a Thumbnail by Converting PDF to Image
Let’s add another API to create a thumbnail of a PDF, a functionality that will pair nicely with the ability to list files in the directory and get a quick preview for each of them.
For this new API, we will use the Apryse library we installed earlier.
app.get('/thumbnail/:filename', (req, res) => {
  const filename = req.params.filename;
  let ext = path.parse(filename).ext;

  const inputPath = path.resolve(__dirname, filesPath, filename);
  const outputPath = path.resolve(__dirname, filesPath, `${filename}.png`);

  if (ext !== '.pdf') {
    throw `Only PDFs can return a thumbnail. Cannot return a thumb for a file with extension: ${ext}.`;
  }

  const main = async () => {
    const doc = await PDFNet.PDFDoc.createFromFilePath(inputPath);
    await doc.initSecurityHandler();
    const pdfdraw = await PDFNet.PDFDraw.create(92);
    const currPage = await doc.getPage(1);
    await pdfdraw.export(currPage, outputPath, 'PNG');
  };

  PDFNetEndpoint(main, outputPath, res);
})
The above code snippet will parse out the requested parameters, ensure the file is a PDF, and generate a PNG thumbnail for the first page, before calling a function we created called PDFNetEndpoint. PDFNetEndpoint definition is below:
const PDFNetEndpoint = (main, pathname, res) => {
    PDFNet.runWithCleanup(main)
    .then(() => {
      PDFNet.shutdown();
      fs.readFile(pathname, (err, data) => {
        if (err) {
          res.statusCode = 500;
          res.end(`Error getting the file: ${err}.`);
        } else {
          const ext = path.parse(pathname).ext;
          res.setHeader('Content-type', mimeType[ext] || 'text/plain');
          res.end(data);
        }
      });
    })
    .catch((error) => {
      res.statusCode = 500;
      res.end(error);
    });
};
This Apryse endpoint ensures that we can execute the thumbnail-generating function without any errors and return an image representation of the first page of a PDF.
To test the endpoint out, enter the following into the browser: http://localhost:9000/thumbnail/test.pdf
Generate PDFs From a Template
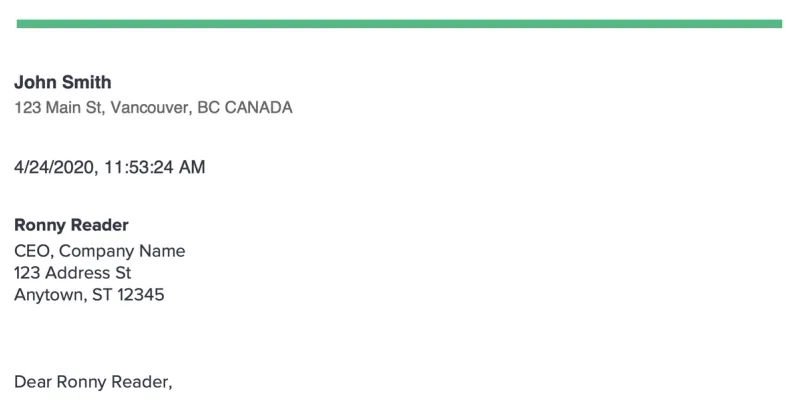
Typically, generating PDFs happens from a source format, like a Word file or HTML markup, which you then convert to PDF using a solution like the Apryse SDK. For example, we have a letter template below, called template_letter.pdf in which we will replace names, dates, and addresses programmatically.

app.get('/replaceContent/:name', (req, res) => {
  const name = req.params.name.replace('_', ' ');
  const filename = 'template_letter.pdf'

  const inputPath = path.resolve(__dirname, filesPath, filename);
  const outputPath = path.resolve(__dirname, filesPath, `${filename}_replaced.pdf`);

  const main = async () => {
    const pdfdoc = await PDFNet.PDFDoc.createFromFilePath(inputPath);
    await pdfdoc.initSecurityHandler();
    const replacer = await PDFNet.ContentReplacer.create();
    const page = await pdfdoc.getPage(1);

    await replacer.addString('NAME', name);
    await replacer.addString('Address', '123 Main St, Vancouver, BC CANADA');
    await replacer.addString('DATE', new Date(Date.now()).toLocaleString());
    await replacer.process(page);

    pdfdoc.save(
      outputPath,
      PDFNet.SDFDoc.SaveOptions.e_linearized,
    );
  };

  PDFNetEndpoint(main, outputPath, res);
});
To test it, in browser, call the endpoint http://localhost:9000/replaceContent/John_Smith. After replacing name, address, and date, our letter is ready to be sent. As you can see, we preserve fonts and styles.
Using Apryse, however, you can also generate PDFs from scratch. In the following sample, we generate a new PDF from nothing and add a blank page.
app.get('/generate/:filename', (req, res) => {
  const filename = req.params.filename;
  const outputPath = path.resolve(__dirname, filesPath, `${filename}.pdf`);
  const main = async () => {
    const pdfdoc = await PDFNet.PDFDoc.create();
    await pdfdoc.initSecurityHandler();
    const page1 = await pdfdoc.pageCreate();
    pdfdoc.pagePushBack(page1);
    pdfdoc.save(
      outputPath,
      PDFNet.SDFDoc.SaveOptions.e_linearized,
    );
  };

  PDFNetEndpoint(main, outputPath, res);
});
After generating a PDF, you can call other APIs to add text elements, images, and so on—either through adding annotations and then flattening them, or element building at a low-level.
Add More APIs and Endpoints
You can also add a number of other document manipulation APIs. In fact, we have put together several Node.js samples for you to try out, including:
- Parse & extract PDF content
- Convert HTML to PDF
- Encrypt and decrypt PDF files
- Compress & optimize PDF files
- Redact PDF content
- Much more... (see Node.js samples)
Conclusion
This article was intended to help you build a simple document processing file server using Node.js and Express using our sample project on Github.
Ultimately, however, we’re just scratching the surface of what functionalities you can add with the powerful Apryse SDK, including dozens of other unique document processing capabilities.
Stay tuned for more APIs and demos, which I’ll be adding. And feel free to reach out with any questions.
Tags
conversion
docx
node.js
tutorial

Andrey Safonov
Director of Product
Share this post


